Today I completed one of my most feared tasks. I’ve been wanting to move Hacking UI to SSL for years, but have been dreading how difficult it will be. Well friends, today I come to you a stronger man, a better man. I have seen the promised land and it is every bit as glorious as I thought it would be. I set up a new HTTPS website for The Side Project Accelerator (the site is in the final stages of design touch ups, and I’ll update this link as soon as we launch it), and I will soon move Hacking UI to HTTPS as well.
The entire set up took me a little more than an hour, but most of the time was wasted reading and rereading poorly written instructions and searching through admin interfaces for the correct place to update my settings. It also took a bit of research to figure out which services to use for what, because a slight change could have easily increased the cost 300–400%.
I’ll walk through the exact steps I took to set up HTTPS because I think with a more thorough guide, you can complete everything in a third of the time.
The exact steps I took
- Total estimated time to completion: 20 minutes
- Total cost $36 (includes the cost of the server, doesn’t include the cost of the domain name)
- Services used: Namecheap (buy domain name and SSL certificate), Heroku (host, SSL manager), Cloudflare (DNS)
1. Bought a domain name
I bought the domain on namecheap.com. I use them for all my domains, because they have a nice UI, their support team has lightning fast response rates, and their prices are almost always the cheapest. What more can you ask for?
2. Bought the SSL certificate
I bought the certificate that I needed also through Namecheap. When you get to the SSL certificates page, you are presented with 3 levels of validation. I bought the lowest level certificate, domain validation. It’s obviously the cheapest by far, and it is the only one that can be instantly activated and doesn’t require paperwork. My site is relatively small and I don’t believe it requires anything too serious. I don’t know a lot about the differences in SSL certificates though, and you should do some research to determine exactly which type of certificate your site requires.
The exact certificate I bought is called “PositiveSSL Multi-Domain” and costs $29 per year. Make sure to buy a multi domain certificate, because with SSL every subdomain is treated as a separate domain. That means even for the www subdomain, which we all have, you will need at least 2 domains. Fuckers. Also important to note that you don’t need to buy a “wildcard certificate” if you just have these two subdomains, or even a couple more. “Wildcard certificates” allow you to use any amount of subdomains, but they typically cost around $100 per year, so you can save a lot of money going with the “multi domain” one instead.
3. Generate a CSR
A CSR is a certificate signing request, and is required in order to activate your newly purchased SSL certificate. There are a few steps in order to generate the CSR. At the end of this, you’ll get a text file that you will copy the contents and paste it back in Namecheap’s dashboard. Heroku has some decent instructions for this part, but I’ll walk you through them below.
First generate a private key using openssl in your terminal window. If you don’t already have openssl, you can install it in one minute with the instructions for your operating system here. Type the following line into your terminal:

Then type this line, which strips the key of its password and will leave you with the ‘server.key’ file which will we use in the next step:

Now from the same directory as that server.key file, type the following code, which will generate the CSR text file you need:

When you enter that line, you will be asked a few questions about your business. You need to enter your two-letter country code, which you can find here (for the United States just put ‘US’). You will also need to enter something called the “common name”. Use the root domain of your website (not a subdomain). So in my case I put “sideprojectaccelerator.com”. We will handle the subdomains later, don’t worry about them for now.
4. Activate the SSL certificate
This step is done back in Namecheap. Go to Account -> Product List, and you will see your inactive SSL certificate sitting in that list. Walk through the steps of the activation process, filling in the requested information. You will need to paste in the contents of that server.csr text file that was generated in the previous step. Once you paste that, Namecheap will infer the root name (which you entered as the common name in step #3), and ask you to fill in up to 2 more domains. Now you should add “www.your_domain.com” to this list. Select to have the certificate emailed to you, and then finalize the activation.
5. Upload the certificate back to heroku
Heroku recently announced that it will include free SSL encryption with all of it’s paid plans. That’s a huge perk, and that means that on my dinky $7 a month hobby plan server I get free SSL.
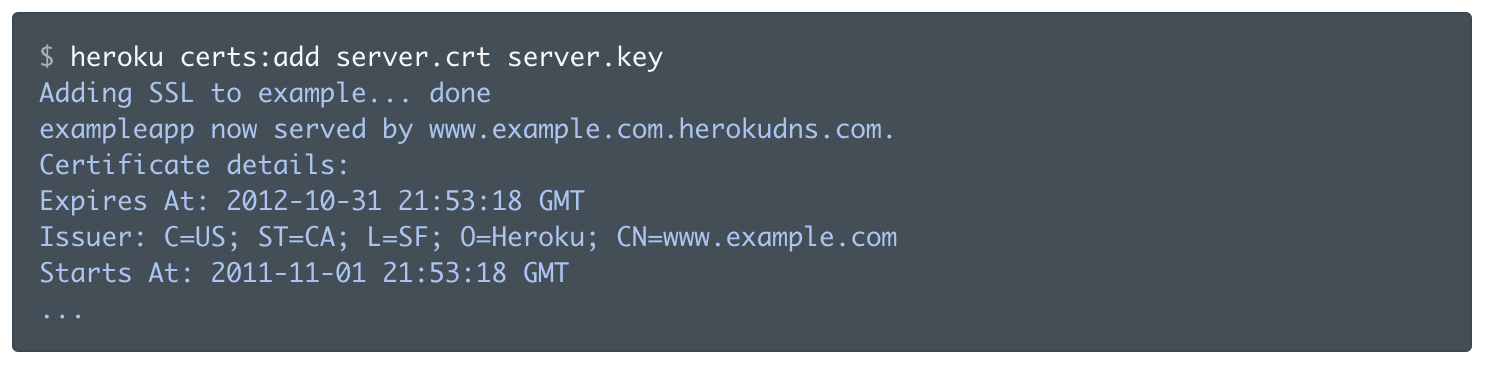
Type the following command to upload the certificate that was emailed to Heroku.
6. Update the DNS records on Cloudflare
Now you need to log in to Cloudflare and update your DNS records to point to Heroku’s DNS server. You need 2 CNAME records. One for the root domain and one for the WWW subdomain.
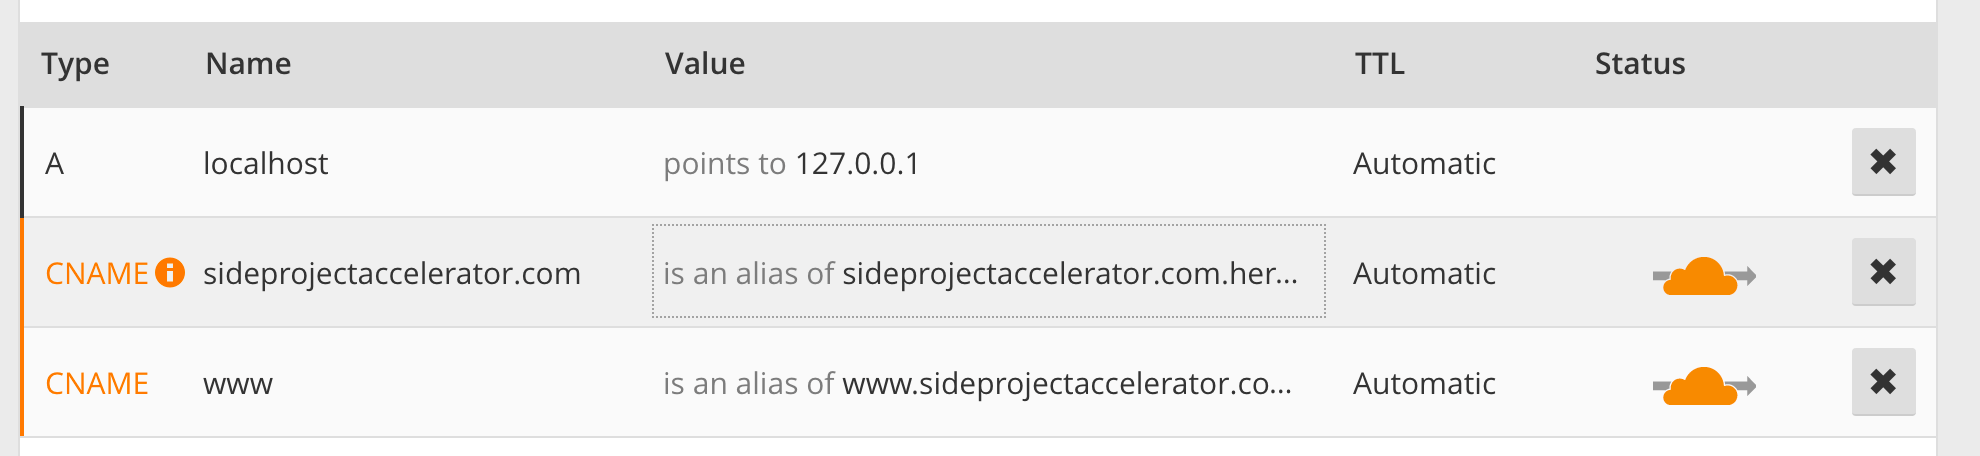
- The value of the root domain CNAME record should be: your_domain.com.herokudns.com
- The value of the WWW subdomain CNAME record should be: www.sideprojectaccelerator.com.herokudns.com
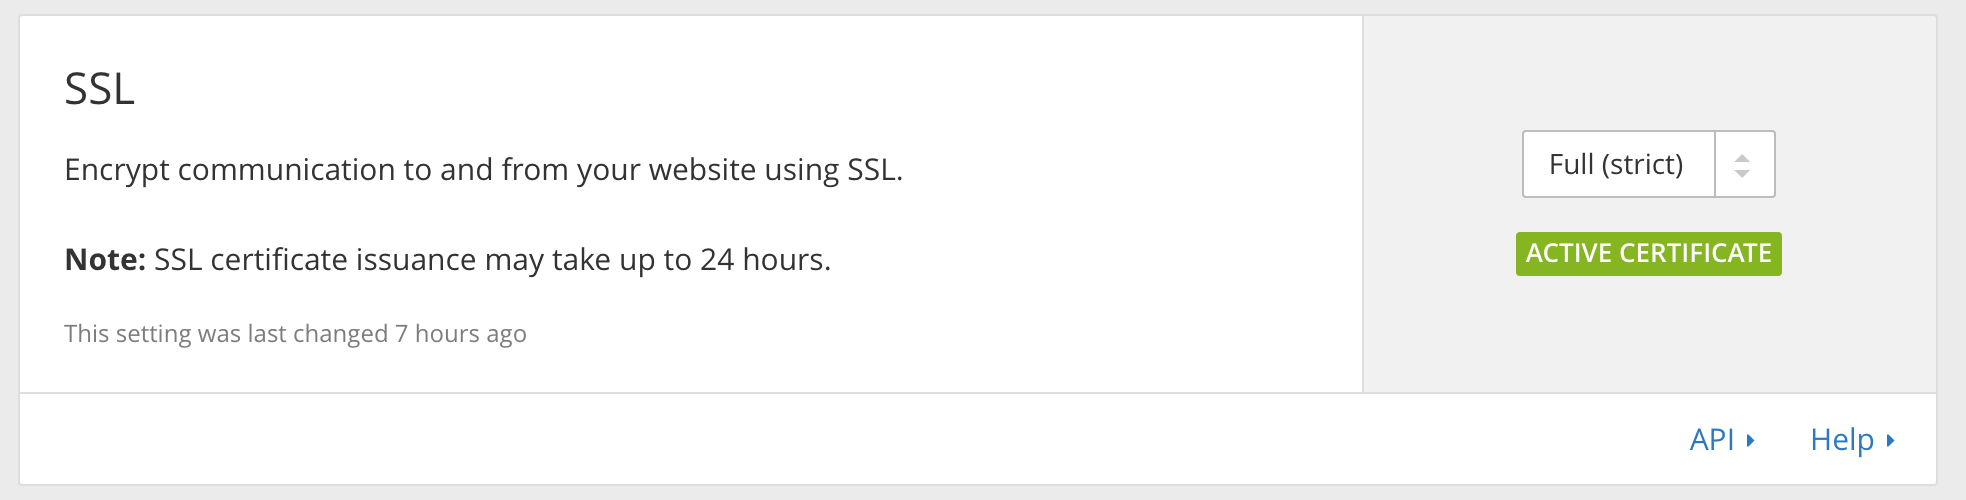
7. Enforce HTTPS
The last step is to make sure that your site is completely enforcing HTTPS and does not let users browse any pages with through an unsecured connection. First go to Crypto -> and update the SSL level to “Full (strict)”.
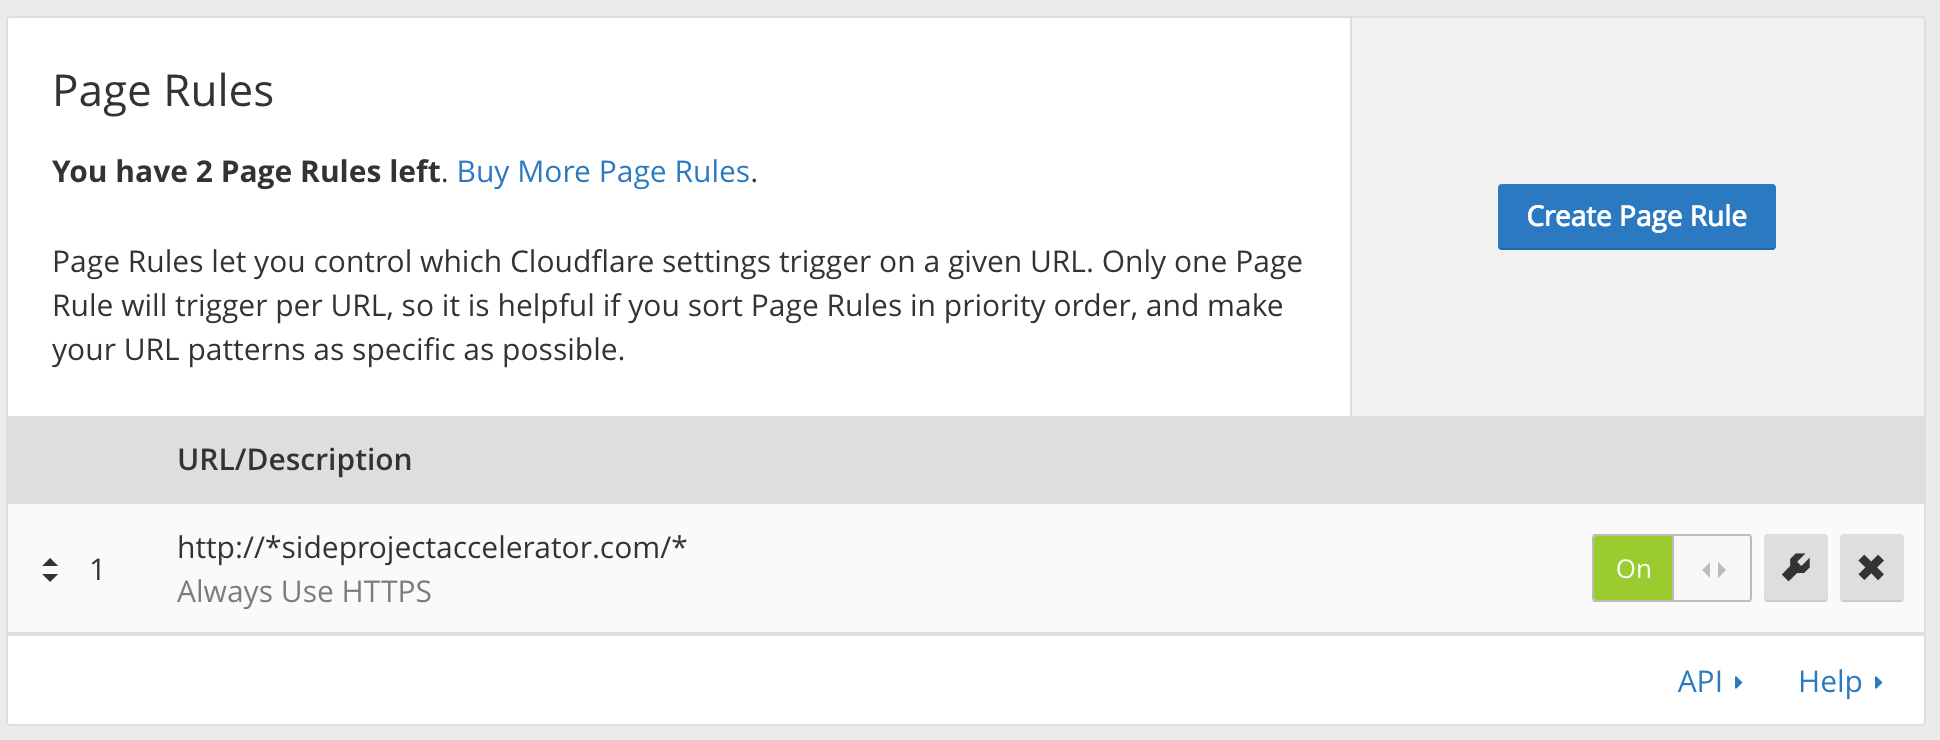
Lastly, go to Page Rules -> Add a rule. You need to add a rule that forces every page to redirect to HTTPS. Just use the format: http://your_domain.com* and select “always use HTTPS”.
And that’s all folks! You’ve got yourself a shiny new HTTPS website.
This is the eighth article in the series of my 30-day writing challenge. Eight straight articles man, that’s hard work. Tweet at me some support, to keep me going.